You can find the students that have registered for your teaching or exam on the Registered students tab of each implementation. Teachers can also manually confirm and add new students to their courses. Registration policies vary between the degree programmes, so make sure to check with your educational planning officer how registrations are handled in your degree programme. You can find their faculty specific contact details on the page Teaching programmes under the heading Contact details for timetabling officers.
Checking the information of the registered students
When you click on a student in the list of participants, a student-specific information window opens, where you can find:
- information related to the student’s study right,
- a link to the student's completed studies,
- the teaching group selections the student has made, and
- the answers for possible registration questions asked upon registration.
Note: Student data is personal data and should only be processed for the purposes for which it is intended and as required for the purposes of the current job. You can read more about data protection and the principles of processing personal data on the Data Protection for Teachers page.
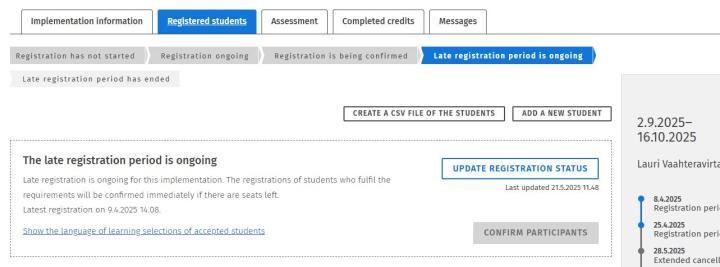
If the student has been asked to notify the language of learning upon registration (e.g. for exams), it can be seen in the list of participants in its own column after the registrations have been confirmed. The link Show the language of learning selections of accepted students opens an information window where the language selections are on their own tabs.
Download the teaching’s list of participants
New: You can now order the participant list from the Course Pages that will be sent to your email. This list also contains the enrolment questionnaires and the prefilled SIMU-sheet can be used to save and import the grades to Sisu. Please note, that the participant lists are only sent three times a day, so there might be multiple hour delay before you receive the list.
You can also create the participant list directly in Sisu. The Create a CSV file of the students button creates a participant list that opens in Excel, where you will find, for example, the students’ email addresses as well as the confirmed groups for each student after the registrations have been confirmed.
The list of participants can also be utilised in evaluation, see the more detailed instructions for evaluation here.
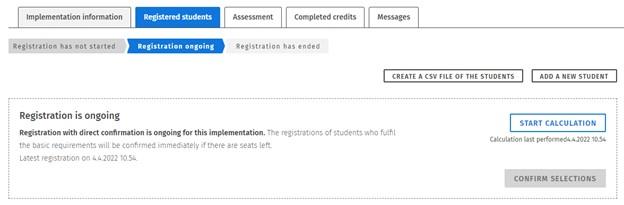
Statuses of the registered students and editing them
Upon registration, Sisu checks that the student has a valid study right, that they have been registered as attending for the duration of the implementation and that the course is a part of the student’s study plan. In addition to these, additional requirements might have been defined for those who are accepted for the implementation, such as compulsory prior studies or being a part of a certain target group. Based on these checks, Sisu sets a student’s status as one of the following:
- Candidates = the student fulfils the course’s criteria and can be selected for teaching when the registrations are confirmed. If there are more registered students than there are available spots, the students will get selected on random from the candidates who fill all the required criteria. Sisu displays the status for each student based on the current situation. The status for each student is open for change whenever more students register the course.
- Requirements not fulfilled = the student does not fulfill a criterion set for the course, such as a valid registration as attending or the student has not added the course to their study plan or has registered through a wrong version of the course (see more detailed information about the selection criteria here)
- Confirmed registrations = a student’s status when the registration period has ended and the registration has been confirmed. In certain cases, an administrator can mark students as confirmed also manually.
- Rejected = a student’s status when the registration period has ended and the student has not been selected for or there was no room in the teaching. You can read more about the most common causes of rejection in the Instructions for students: What should I do if my registration is declined?
In addition, after the teaching has started, a student can discontinue their participation on the Study calendar page or they can be marked as discontinued by the teacher or administration.
Changing the students’ statuses
A teacher and an administrator can change the status of students’ registrations as follows:
- Select over others = when the registration period is ongoing, a student can be marked as preselected. When the registration period ends, the preselected students will be accepted first for the course in the final count
- Cancel preselection = a preselected student can be changed back as a candidate with this feature
- Mark as rejected = the student is not selected for the course and the student’s registration is rejected after the registration period ends
- Mark as discontinued = when the teaching has started, you can mark a confirmed student as discontinued, and the student will be moved to the “discontinued” section. After the teaching has started, a student can discontinue the course themselves.
- Mark as confirmed = this will move the student directly to the confirmed section. This might be useful if you need to bypass a certain selection criteria that otherwise prevents a student from being accepted, or if a student needs to be moved from the rejected section to the confirmed section.
- Remove from implementation = this can be used to delete the student’s registration. Should only be used if you have, for example, added a student to a wrong implementation. If a student has dropped out from the course, it is better to mark them as discontinued.
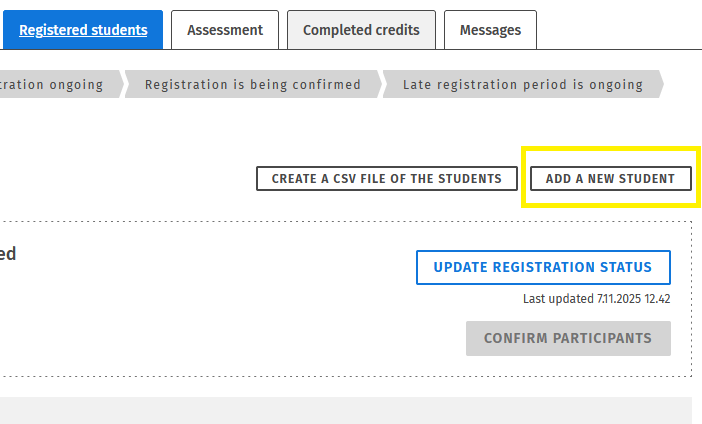
Adding a new student
Students should first try to register themselves independently, so that it is made sure the student has added the study unit to their study plan. However, if there is a need to add a student’s registration, it can be done by using the add a new student -button.
- First search the student by using either their student number, name, or their e-mail address. If the student has multiple active study rights, you have to choose one of them to which the student’s registration will be attached to.
- Also add group selections for the student if there are choices to be made and choose to which version of the study unit the registration will be attached to. The version should be the same that the student has in their study plan. If you add the registration to a different version than the student has in their plan, the student’s registration will go to the requirements not fulfilled section, from which you may have to manually move the student to the confirmed status.
- NB. If a student is manually accepted from the "requirements not fulfilled" section, they will be placed in the groups they fit into according to their preferences. If the student does not fit into any selected group, a red warning triangle will be displayed in the confirmed section on a per-student basis. From the "Edit student's teaching groups" window behind the button on that row, you can place the student in teaching groups with available space, thereby removing the warning triangle.
- NB. There needs to be seats left in the course for you to be able to add new students.
- NB. If the implementation is open university teaching or co-organised as open university teaching, do not add students to the course by yourself. You can recognize open university teaching based on a notification 'The course implementation is part of Open University product packages' that appears above the tabs.
Changing the group selections
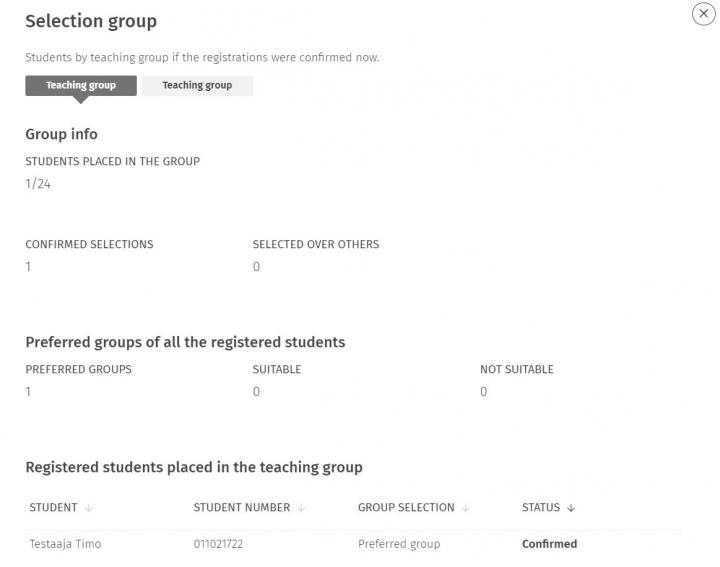
If there are group selections made by the students related to the teaching, you will see the student’s preliminary group placements during the registration period in the section Students by teaching group if the registrations were confirmed now.
The Show students assigned to the teaching groups button opens up a new window where you can view the students by teaching groups in more detail, and you will see how many students are placed in each group and with what group selections. No more than the maximum capacity of students can be placed in a group (or an implementation).
Group selections are not meant to be edited per se, but the student will make their own group selections and Sisu places the students in the right teaching groups in a priority order. If there is a need to get a specific student on the implementation, it is better to use the preselection (select over others) or an administrator can mark the student directly as confirmed (mark as confirmed).
However, group selections can be edited in situations where
- the student cannot edit their group selections themselves (e.g. the registration period has ended, registration has not been confirmed yet).
- if it is necessary to balance the groups, as Sisu does not automatically equalize the groups to the same size. Sisu can create very differently sized groups, if the students' group selections allow it.
- the teaching group is cancelled after the registration period has ended, and the group selections have to be changed.
You can edit group selections student-by-student on the student’s line from the Edit the student’s teaching groups section found behind the three dots.